Review before you bond
Inspect bracket positions on the digital arch before the jig is prepared. Give the planning stage the attention it needs.
Digital indirect bonding
Plan bracket placement before the bonding appointment. Choose your brackets, refine each position and generate a transfer sleeve from the approved setup.
For orthodontic practices and their lab teams.
Software assists. The clinician reviews and approves.
Built around your decisions
Inspect bracket positions on the digital arch before the jig is prepared. Give the planning stage the attention it needs.
Adjust individual positions to your prescription and clinical judgment. AI suggestions are a starting point for your review.
Move from the reviewed digital setup to jig preparation, with clear responsibilities for your practice and lab team.
The workflow
See where the software helps—and where your team stays involved.
Import STL or PLY files exported by a compatible intraoral scanner. Review the scan before planning.
Practice or lab teamSelect a supported bracket design or customize your own. Refine individual positions, review the setup and approve it.
Clinician reviewAfter bracket adjustments and approval, generate the sleeve—the transfer jig used in the indirect bonding workflow. Your team or lab prints and prepares it.
Practice or lab team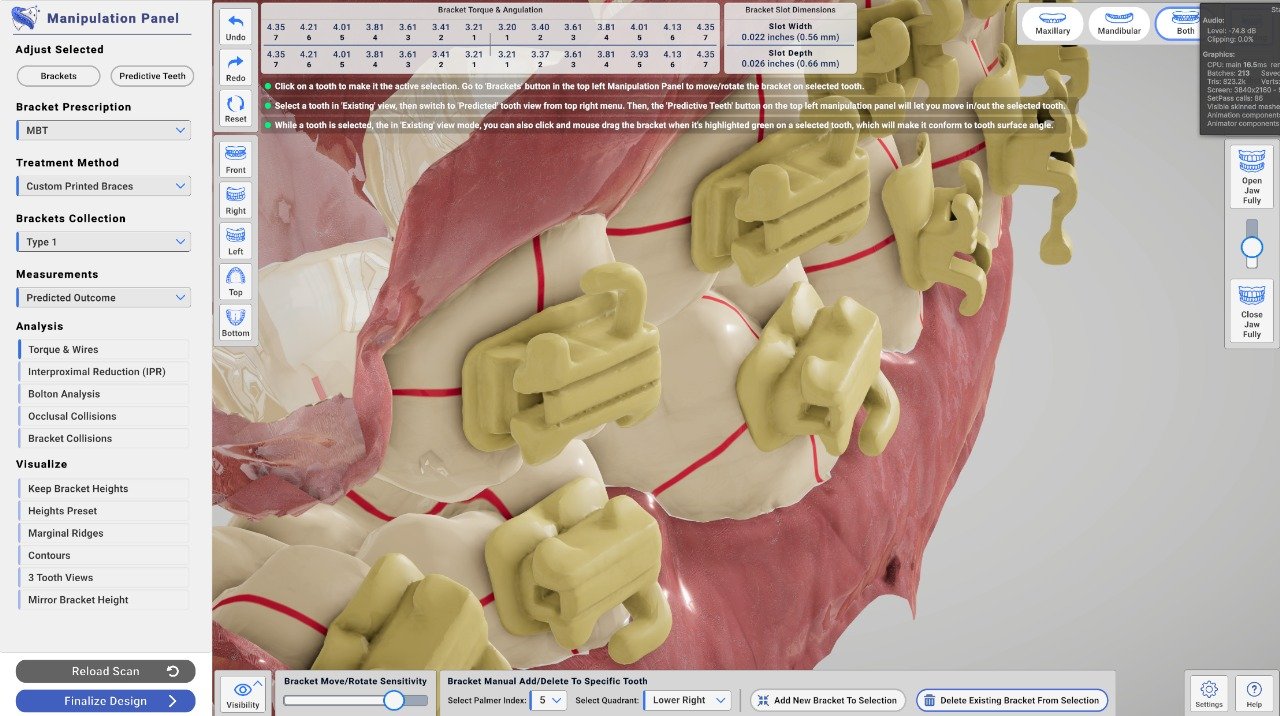
The sleeve is generated after the bracket setup is approved. Digital design, printing, post-processing and chairside bonding remain separate stages.
Bracket options & design control
Explore bracket appearance and geometry while keeping your prescription and clinical review at the centre.
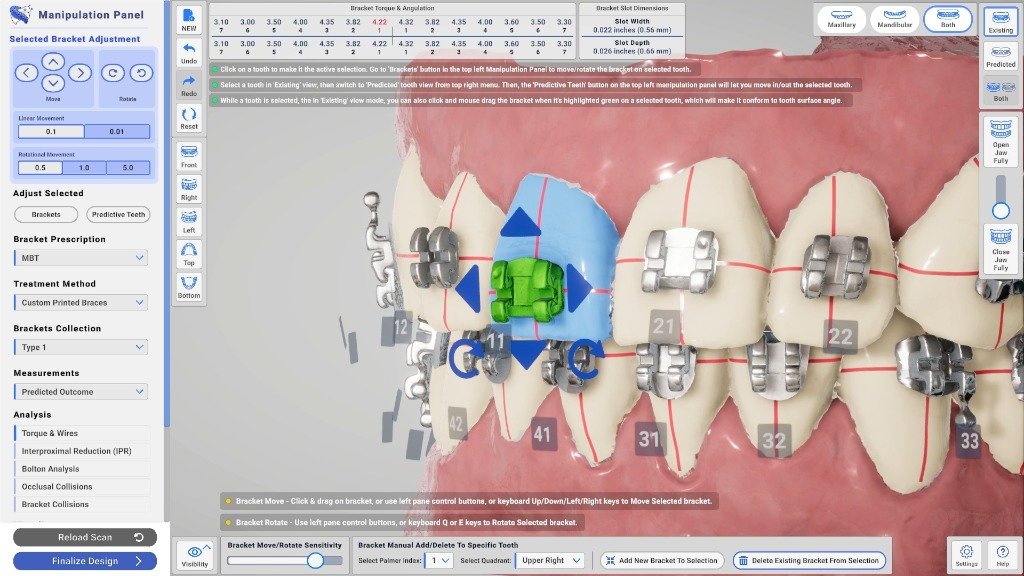
Explore supported bracket types in your demo. The screen above shows the metal bracket view.
Choose a supported bracket design for the system you use, or work with a customizable bracket model. Visualize metal, ceramic and other supported bracket types on the digital arch.
Confirm your exact bracket brand, model and prescription with the team; a material choice does not imply support for every manufacturer's product.
Adjust the bracket base geometry, length and width. Keep the existing slot dimensions or configure them for your intended archwire specification.
Custom digital geometry requires manufacturing and clinical suitability checks before physical use. A matching slot dimension alone does not establish archwire compatibility.
Refine vertical and horizontal position, rotation, angulation and torque for individual brackets. Inspect each change in the 3D view before approving the complete setup.
Bring your prescription to the demo to see how the adjustment controls fit your planning process.
Review the available bracket and occlusal collision checks before approving the setup. Use flagged areas to guide closer inspection and any necessary adjustment.
Geometric checks support review of the digital plan; clinical assessment is still required.
Inspect bracket appearance, surface detail and the relationship to the digital dental arch using realistic 3D rendering. Use close-up views to review and discuss the proposed setup.
Rendering supports visual review; it is not a prediction of tooth movement or proof of clinical accuracy.
Intraoral scan input
Import supported STL / PLY exports. Availability depends on your scanner model, software and export options; confirm the file workflow during your demo.
Take a closer look
Follow the product walkthrough, then use a live demo to explore the details that matter to your practice.
That is the question your demo should answer.
Bring your bracket system, scanner details and current lab process. We’ll walk through the workflow and discuss compatibility, training and costs.
A practical conversation. A real product demonstration.Before you get started
Understand the workflow before deciding whether it belongs in your practice.
Confirm current plan features and suitability during your demo. Printing, materials and lab services should be budgeted separately.
Yes. BraceFlow provides assisted initial positioning and manual adjustment controls. The clinician reviews and approves the setup; software suggestions do not replace clinical judgment.
The workflow involves both clinical review and technical preparation. Your demo will clarify who operates the software, who approves the setup, and whether jig production takes place in your practice or with your lab.
BraceFlow supports compatible STL and PLY scan exports. Scanner families can include TRIOS, iTero, Medit and Carestream, depending on available export options. Share your scanner model, exact bracket system and prescription to confirm the workflow. Scanner file support and bracket library support are separate checks.
The sleeve is the transfer jig created from the approved bracket setup. It is generated after you finish adjusting bracket positions, then produced and prepared by your practice or laboratory for the indirect bonding workflow.
Ask to see the physical output, seating process and supported production workflow during the demonstration.
This is a planned development of the transfer sleeve design, focused on a defined seating path and visual confirmation during bonding. It is separate from the current sleeve-generation workflow; ask the team about release availability.
A printer is needed to produce the physical jig, but production may be handled by your lab. Confirm the printer, material and post-processing workflow with the team before clinical use.
That depends on your current process, case complexity and team experience. Evaluate digital setup time, printing and preparation, and chairside time separately. Ask to see a representative case from start to finish during your demo.
Ask the team to explain onboarding, support, deployment options and how scans are stored, accessed and deleted. Agree on a suitable data-handling process before sharing any patient information.
Your next step
A live walkthrough. Your workflow questions.
A clear conversation about fit and cost.
30-minute meeting · Choose a time that suits you
Opens the Ekarthaan booking calendar.